


Hello, I'm Mr. Wanderer, back again with a review of my travel backpack. This time, it's my second solo backpacking trip abroad in a month. After testing my courage to go solo in Malaysia (Cameron Highlands), I had the opportunity to travel to Hokkaido, Japan. I must say that my English is not good, and my Japanese is even worse! Of course, many people plan their trips to Japan months in advance, sometimes even a year ahead, especially for first-timers. This includes planning itineraries, booking flights, and accommodation. The earlier you book, the cheaper it is. Some people even wait for promotions. However, I didn't have a plan, book flights, or accommodation until less than 10 days before my departure. Yes, you read that right! Why? Because I was slow to make decisions, hesitant, and worried about whether I could survive on my own. But after returning from my solo trip to Malaysia, I felt more confident and decided to go backpacking to Japan on this trip, with less than 10 days to prepare. But wait! After returning from Malaysia, I continued my journey to Vietnam, which meant I had less than 3 days to research while I was there. I barely had any information, so that's where the "No Plan" came from - going without a plan (is that the right way to say it?). Anyway, let's follow me on my confusing and lost backpacking adventure!
Follow my travel adventures on my Fanpage below.
https://www.facebook.com/saphipae/

Prepare to book tickets and accommodation, and exchange 18,000 baht in cash.
Traveling abroad requires planning, especially for booking flights and accommodation. However, as mentioned in the topic, this trip was a spontaneous decision, necessitating immediate booking.
This time, I booked my flight and accommodation through Expedia (https://www.expedia.co.th/), which offered a discount for booking both together. I entered my travel information, specifying Chitose Airport on the island of Hokkaido as my destination, hoping for available seats despite booking just a few days before departure.
Fortunately, one last seat was available at an acceptable price of 13,460 baht (roundtrip), including all taxes and fees. This was fortunate, as last-minute bookings typically come with a hefty price tag. Given the reasonable price, I decided to book my accommodation through Expedia as well, taking advantage of the 25% discount for combined bookings. However, booking during a promotional period might have yielded a better price.

For promotions, please visit this link. PROMOTION CONTENT Travel anywhere with Expedia!
https://www.expedia.co.th/OOHcampaign…
Book accommodation on Expedia
http://bit.ly/ExpJPatbg4


===== Select accommodation with a price of 500 baht in the heart of Sapporo city center. =====
I opted to book a single accommodation for my entire 10-night stay due to the uncertainty surrounding my travel plans. Booking a single location allowed me the flexibility to explore other cities without the hassle of finding new accommodations. Additionally, as a backpacker, I prioritize affordability and convenience. The hostel's proximity to the city center and train station made it an ideal choice for exploring Sapporo and its surrounding areas. The Khaosan Sapporo Hostel, with its Thai-inspired name, offered a comfortable and affordable stay at 585 baht per night.
With my backpack packed and ready, the exciting adventure was about to begin. ..... .. I managed to snag a cheap ticket, but it came with a trade-off: a layover in Hong Kong. There were two flight options: a one-hour layover and a three-hour layover. My choice? The three-hour layover, of course! Many might think I'm crazy, asking, "Why waste three hours waiting?" Well, it was my first time transferring flights, and I was worried about getting lost, missing my connection, or even worse, missing my flight altogether. Better safe than sorry, right? (Besides, it's not like the plane was delayed anyway. What a perfect plan!)

=== WIFI is essential when traveling in Japan. ====
..
..
Due to the lack of travel planning and information, another essential item for this trip is Pocket wifi.
I brought a Pocket wifi from Samurai Wifi with me from Suvarnabhumi Airport. The rental fee is only a few baht per day.
But don't forget to inform the region you will be visiting before renting. For example, I went to Hokkaido, and the signal was good without any problems.
It was very helpful. You can see more details at http://www.bs-mobile.jp/th/

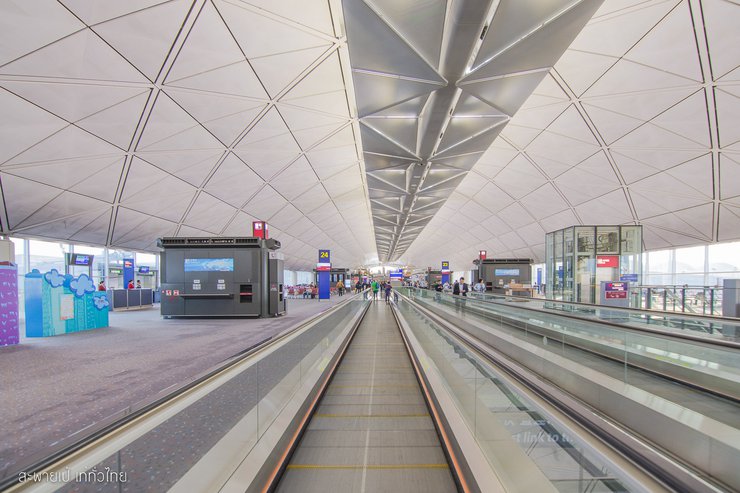
==== First morning at Hong Kong Airport ====
..
..
Arrived at Hong Kong Airport just in time for the morning. This morning there was nothing to do, so I sat around, walked around, charged my devices, and took a few pictures.
I didn't eat breakfast (I usually wake up late and don't eat breakfast) or maybe it was an excuse because I didn't exchange any Hong Kong dollars. I only had Japanese yen.
I didn't know if I could use them together. I was afraid that if I ordered something and didn't have enough money to pay, I would be embarrassed. And I didn't want to use sign language too much. 555


It then soared through the sky to its destination.

=== Arrival at Chitose Airport [Strict Immigration Check and Sniffer Dog Inspection] ====
...
..
The excitement began when I almost didn't pass immigration at Chitose Airport. The incident occurred after I got off the plane and had to fill out an entry form.
Oh no! How do I fill it out? Where is the pen? I can't read it. Everyone else had already filled it out on the plane. I looked around for other Thai people, but there were none.
I walked out of the queue and hid until everyone else had passed through immigration. I was the only one left, a country bumpkin in the city, clueless.
By the time another flight had landed and almost everyone had passed through immigration, I had filled out the form as best I could, with my name, surname, address, and passport number, which I barely remembered.
What would happen when I went to immigration? !!!!

The officer looked confused when I handed him the documents, wondering where I had been. The plane had landed a long time ago, and I was just entering immigration. He pointed to the back of the paper and said something that I could only guess meant I hadn't filled out the form completely. There was a checkbox on the back that I needed to tick. Confused, I pretended to understand and went back to fill out the form again. I thought I had gotten away with it, but then an officer called me into a room with my backpack. I was worried I was going to be sent back, but the officer just wanted me to open my bag. A police dog was sniffing around it. I explained what was inside, but the officer didn't seem to understand. I just kept saying "I travel and photography" over and over again. After a while, the officer probably got tired of me and let me go. I guess he just wanted me to stop taking pictures.

==== Finding Your Way from New Chitose Airport to Sapporo ====
..
..
Oh my! It's much easier than I expected. Before coming here, my friends told me that traveling by train here seems complicated and confusing. But when I actually arrived, it was easier than I thought. Besides, I already knew some of the fixed vocabulary and place names. I just had to look at the destination I wanted to go to, which train line to use, and which station to get off at. The price would be displayed, and all I had to do was tap the price and insert the bills or coins. The ticket would then be issued. The ticket from the airport to Sapporo Station costs 1070 yen.

My destination station is Sapporo, the central hub for trains traveling to various cities. I will also need to transfer to the subway at this station to reach my accommodation, which is only a few stops away. Transferring is not difficult. As I mentioned, check the name of the station you want to get off at and see which train line it is on. When you go to wait for the train, there will be a clear sign indicating which platform to board the train for your destination. (It sounds so easy, doesn't it?)

Upon arriving at Sapporo Station (N06), I transferred to the subway (Namboku Line) to reach Susukino Station (N08) for my accommodation. The fare was 200 yen, which I paid at the ticket machine. To reach the platform, I followed the signs for the subway, paying attention to the direction of the train to ensure I boarded the correct side.


==== Day Two - Relaxing Stroll and Photoshoot in Sapporo City ====
..
..
After a night of travel and a full day, I arrived at my accommodation just as darkness fell. I went straight to bed and slept soundly.
As a result, I had no plans for the day and even woke up late. I decided to keep things simple and explore the city center on foot, taking photos along the way.
The weather was cold, so I skipped the shower to save time. Instead, I spent about an hour researching local attractions using my trusty SAMURAI WIFI pocket Wi-Fi, which I rented at Suvarnabhumi Airport for a few hundred baht per day.
With information and phone (equipped with GPS) in hand, and my battery fully charged, it was time to hit the streets, focusing on the vibrant fall foliage.

Before embarking on my daily adventures, I always begin my journey at "Suzukino" Station, Exit 2. This station is conveniently located near my accommodation and provides easy access to the train that connects me to Sapporo Airport. In this review, I will narrate my travels starting from Sapporo Station, except on days when I spend the night in another city.

==== Hokkaido University ====
..
..
Getting here is easy. Take the train to Sapporo Station and exit through the North Gate, either exits 8, 9, or 12. This time, I exited through gate 12 and came to an intersection. I crossed the street to the right and walked until I reached another intersection. I turned right, and the university was on my left. This road leads to the entrance at Gate 3. If you have time, you can take a walk around the university.


==== Nakajima Park ====
...
..
To get there from Sapporo Station, take the NAMBOKU LINE subway to Nakajima Station and use Exit 3. This will bring you directly into the park. However, when I visited, the leaves had not yet turned red and were still green and yellow. Nevertheless, there were still some nice spots for taking photos.


==== JR TOWER Observation Deck ====
...
...
Sapporo City Observation Deck .. After walking around taking pictures in Nijo Park, it was almost 4 pm, but why did the sun set so early? I found out later that in Hokkaido, it starts to get dark at 4 pm, so I was going to go back to my accommodation, but I saw the beautiful sunlight in the sky.
I immediately opened my phone to find information about a high-angle photo spot in Sapporo....
"JR TIWER" Where is it? How do I get there? ... "Oh my god, it's right under my nose at Sapporo Station. It's only 3 train stations away. So I didn't hesitate.

Upon arrival at Sapporo Station, look for this sign. It's easy to spot and follow. The observation deck is located on the 38th floor. The sign will lead you to the elevator, where you can press the button for the 38th floor.

Upon exiting the elevator, visitors will encounter ticket sales personnel. Admission to this location costs 720 yen.

Unfortunately, I arrived too late to see the sunset, but there was still some light left. The JR TOWER observation deck offers a 360-degree view of Sapporo city. You can walk around the entire deck and enjoy the view from all sides.


Don't miss the opportunity to visit the restroom when you reach the top. Enjoy the breathtaking views while taking care of your business. It's an unforgettable experience!

The first day's dinner ended like a king. What will happen tomorrow is still unknown.
Upon arriving in Japan, indulging in fresh seafood is a must. In Sapporo, besides the renowned fresh seafood, the local beverage of choice is undoubtedly Sapporo Beer. This meal was a delightful experience, leaving me feeling full and content, although slightly tipsy due to a menu mishap. The menu was entirely in Japanese, with no accompanying pictures, forcing me to rely on guesswork (a decision I may regret for eternity). For instance, after waiting nearly an hour for our food, which had yet to arrive, while those who arrived later were already being served, I had consumed three, then four glasses of beer. Still, our food remained elusive. My suspicions were aroused when the server brought more beer. "Hold on," I thought, "I don't recall ordering this much." It dawned on me that I had inadvertently ordered an all-you-can-drink beer buffet. Changing tactics, I pointed to a nearby table, indicating that I wanted the same. I was starting to feel the effects of the alcohol...or perhaps it was just hunger pangs setting in.


Day two: 22,000 yen (over 6,000 baht) has been lost, and this is what I will have to eat for the next 8 days.
..
.
On the second day of my trip, I encountered a major setback. Due to my carelessness, I lost 2 ten thousand yen bills and 2 thousand yen bills from my back pocket.
Initially, I wasn't too concerned as I wasn't familiar with the value of the yen.
However, upon checking online, I realized that the missing amount was equivalent to over 6,000 baht, which was the budget for my remaining meals. I'm unsure when or where I lost the money, but it could have been during the all-you-can-drink beer buffet the previous night, which may have affected my awareness.
While I enjoyed a luxurious meal the previous night (the most extravagant meal of my trip), my eating plans have now changed.
After calculating my remaining funds, factoring in train fares, entrance fees, food costs, and the beer buffet, I have approximately 9,000 baht left for the remaining 8 days of my trip, covering food, transportation, and entrance fees.
Fortunately, I had paid for my accommodation in advance before my departure, which inspired the title of my trip.
My solo backpacking adventure in Hokkaido: "[Hokkaido]... [Amidst the Changing Leaves] 9 Days with Limited Funds (xxxx)"
...
And so, my meals will consist of instant noodles, which I will purchase from 7-Eleven, and Sapporo beer, which I must limit to two cans per day.
(The advantage of my accommodation is that it has a kitchen equipped with a stove, cooking utensils, a microwave, and a refrigerator.)
vvv
vv
v

==== "Jo Sang Ke" - Wandering Around Until Arrival ====
...
.


After researching travel information last night from my accommodation, I was still confused (where should I go?). I guessed and searched for information online and in travel books. I decided to check it out. It looked beautiful from Google... However, there is no train to "Jozankei". I had to take a bus from Sapporo Station, which is the same place I started my journey, as I mentioned earlier.
From Sapporo, I got off at the station (I don't know the name), but it was a tourist information center. I could contact them to visit the dam or walk around the city first because there were colorful leaves to see.
However, this city (when I visited) not only had colorful leaves but also the most famous "onsen" in Hokkaido.

Scenic roadside views captured from the car on the way to Jozangke.

The roadside was adorned with colorful foliage, primarily on the mountains, creating a captivating view during the journey.


Imagine the excitement ... Even at a red light, they couldn't resist raising their camera to capture the moment.


We have arrived at Jozankei. It's a bit confusing, so if you're new here, I recommend printing out a picture and showing it to the bus driver. Unlike in our country, there are no bus conductors to ask. The first thing to do when you arrive in Jozankei is to find the popular spot, which is on this bridge. I can't remember the name, but it's easy to find because there are a lot of tourists walking and taking pictures. ... ... I won't explain too much, as I'm afraid the information might be wrong. I didn't have any information before I came here (not recommended). Anyway, let's take a look at the atmosphere in Jozankei.
The


Nature Trail for Viewing Autumn Foliage


Visitors can walk along the nature trail to see the changing leaves. If you don't want to walk, you can get off at this stop.
The entrance road is a three-way intersection located diagonally across the street. However, it is recommended to walk around as it is more enjoyable. This is because the city of Jozankei is a small town.


Upon reaching the three-way intersection, turn left immediately.
====Hoheikyo Dam====
Another popular spot for viewing autumn foliage in the city of Jochangke.
...
..
Getting to the dam is not difficult, even for first-time visitors and solo travelers like myself.
After admiring the changing leaves, I walked back to the tourist information center (where I got off the bus earlier).
Then I went to buy a bus ticket to the dam. It was easy; I just pointed at a picture of the dam (as displayed inside).
They issued me a ticket.


For those without personal transportation, a short bus ride from the tourist service center will take you to the starting point for the walk into the dam.
For those who prefer not to walk, there is an electric bus service available. As for me, my concept is to walk, but since it was getting late when I arrived, I had to hurry up. So I took advantage of the electric bus service for speed. However, I secretly regretted missing the view along the way, as the bus did not stop for sightseeing. If you come here and want to take pictures, I recommend walking in.
..
.
Electric bus ticket sales point


Once you have purchased your ticket, please proceed to the front of the line to board the bus.

The path will pass through a tunnel under the mountain. It is observed that a number of tourists are walking in to visit.

As I emerged from the tunnel, the vibrant hues of autumn foliage unfolded before my eyes. To my dismay, the car did not stop for me to capture the breathtaking scene.


Arriving at the dam in the late afternoon, the sun was already obscured by the mountains, making it an inconvenient time for photography. Nevertheless, we decided to capture what we could from the available vantage point, which offered a view of the dam's crest.


After taking a few photos on the dam crest, we quickly ascended to the observation point for a panoramic view of the dam. A free cable car is available for those who prefer not to walk. As for me, with limited time and no money for accommodation, the cable car was the obvious choice.

Upon reaching the summit, you will be greeted with a breathtaking view.
The Hoheikyo Dam, a 102.5-meter-high concrete arch dam, is a renowned tourist destination in the city of Jozankei.

The summit offers stunning panoramic views, as well as accommodation and dining options. While the menu primarily features grilled dishes, the restaurant appeared to be closed upon arrival. Even if it were open, my budget only allowed for instant noodles.
With that, my journey to Jozankei comes to an end. It's time to head back to my accommodation and boil some instant noodles. Another day of exploring Hokkaido concludes. Tonight, I'll research my next destination. Where will my backpack take me tomorrow?


==== Day 3: Strolling through the Old Town of Otaru ====
...
..
After filling my stomach with two packs of instant noodles and an extra egg from the local Seven-Eleven (which came in a pack of 4), I started researching my next destination. After considering various options and transportation methods, I decided on Otaru.
This charming old town on the island of Hokkaido would be a welcome change from the autumn foliage I had been seeing lately.
Otaru, a small yet captivating city on the island of Hokkaido, is renowned for its romantic atmosphere, attracting visitors from far and wide. Even with limited time, one can easily explore the town on foot and soak in its charm.

The day began with a leisurely wake-up, as Otaru is conveniently located within a short distance from Sapporo. As usual, I took the subway from Sapporo Station, my usual starting point for exploring nearby cities. As mentioned earlier, the ticket costs 200 baht. The process of purchasing tickets and boarding the train is straightforward and has been described in previous posts. For those unfamiliar with the system, fear not, as it is remarkably simple and intuitive upon arrival.


==== Journey to Ota Ru City ====
There are two main ways to get to Otaru: by train or by bus. I chose to travel by train because I am starting to enjoy train travel.
Upon arriving at Sapporo Station, head straight to the ticket vending machines. Select your destination station, check the price, and press the corresponding button. Your ticket will be dispensed along with your change. For my trip, I opted for the local train, which was affordable at 640 yen. A round-trip ticket costs 1200 yen, offering a slight discount and an additional one-day pass for the Sapporo subway. While this seemed like a good deal, purchasing this type of ticket requires interaction with a staff member, and as I mentioned earlier, my English skills are limited. Therefore, I opted for a regular one-way ticket, which might be slightly more expensive but saved me the hassle of language barriers. Although I missed out on the free subway pass, the convenience of a straightforward purchase outweighed the potential savings.


After purchasing tickets and boarding the train, the journey began. Shortly after departure, the scent of the sea and stunning coastal views en route to Otaru greeted passengers. The ambiance was further enhanced by the sound of birds chirping within the train carriage (the species of bird was unidentified, but its song evoked the seaside). For those seeking to admire the ocean scenery during the trip, it is recommended to choose seats on the left side of the train. Local trains do not have assigned seating, allowing passengers to select their preferred seats freely.


Upon arriving at Otaru Airport, there is no need to wait for transportation. Simply walk! The city is small and easily explored on foot. This is a great way to save money and explore the city at your own pace. Today, I plan to focus on exploring the city center.


For those arriving by bus and returning by bus, the bus station is located behind the train station.

After exiting Otaru Station, I was unsure of where to go. In the distance, I could see the sea at the end of a long road. I decided to walk along the main street towards the sea, taking in the sights of the city. I didn't know the names of any of the places I saw because I hadn't planned my trip. I had only decided to come the night before, and the names of the places were difficult to remember. Later, I realized that I had missed many of the main attractions. For those who are interested, information can be easily found online, in travel books, or even in Japan at tourist information centers and major train stations, where free tourist information in Thai is available.


==== Temiya Railway Station, take a train to Nam ====
Wandering around the city, I stumbled upon an old railway line. Deciding to follow the tracks, I hoped to find something interesting to photograph. Little did I know that this was the Temiya Line, an abandoned railway line that had been converted into a public park.
As I continued walking, I heard the sound of a bell and a whistle, indicating the approach of a train. To my surprise, it was a steam locomotive! The train stopped at Temiya Station, which had been transformed into a museum showcasing vintage trains. Eager to see the steam locomotive in action, I purchased a ticket and entered the museum.


The interior houses a locomotive shed and old, unused trains. After a short walk, you can wait for the train to pick up and drop off tourists.


The steam train has arrived! It operates six round trips daily, transporting tourists from TEMIYA Station to the train shed.


After riding the steam locomotive, it was the shortest train ride I've ever taken.
It was so short that the song I was listening to ended before the ride was over. 55555 But it was a nice experience.
..
..
Another way to explore the city of Otaru is by taking a rickshaw ride. A rickshaw is a two-wheeled cart pulled by a person, and it is a popular mode of transportation in many Asian countries. In Otaru, rickshaws are a great way to see the city's sights and sounds, and they are also a fun and unique way to get around.


The Otaru Canal, constructed in 1923, was initially a waterway for mooring ships and loading and unloading goods from warehouses. Today, these warehouses have been transformed into shops and restaurants for tourists. The picturesque canal walk, with its backdrop of charming warehouses, is a popular spot for photography. For an optimal experience, consider visiting the canal in the evening. While waiting for the ideal lighting, I took a leisurely stroll along the canal and grabbed a bite to eat, as I hadn't eaten anything since morning.


Across the street, there are shops and restaurants. Otaru is famous for its "sashimi," and there are many restaurants. It's hard to believe that there are so many restaurants in such a small town. As for the sashimi that is said to be famous in this town, I hope to eat it. However, I don't really like it personally. (I don't have any money either) 5555555


A cold bottle of beer (not sure what kind) and 5 pieces of the famous fried chicken (or maybe not) were all it took to keep me going until the next morning. I couldn't even finish it all, so I put the leftovers in my bag to use in instant noodles later that night.


This is another highlight of this place, the Otaru Canal in the evening. If you come during the snowfall, the place will be covered in snow, creating a romantic atmosphere. It's another city I didn't plan to visit, but it didn't disappoint. The cool air and the classic, charming city are captivating.
Directions: From JR Otaru Station, cross the street and walk straight for about 700 meters. You will reach the canal without having to turn anywhere.
I came here without knowing, just walking straight and I found it.


Don't get too carried away with your sightseeing and forget to check the time, or you might miss your train like I did. I almost missed my train and had to sleep at the station. Luckily, I made it on the last train. This concludes my trip on day 3 in Otaru. Stay tuned for the next episode to find out where I'll be going next.

The first part of my solo backpacking trip to Hokkaido concludes in Otaru.
The remaining locations will be reviewed in Part 2.
...
..
Thank you to everyone who visited, liked, and voted for encouragement.
See you soon in the next episode of the "Hokkaido" solo backpacking trip during the fall foliage season.
Follow my travel updates on my Fanpage: [link to Fanpage]
https://www.facebook.com/saphipae/
Episode 2 is now available.
Link to a comment on the Pantip website.


สะพายเป้ เท่ทั่วไทย
Friday, October 4, 2024 3:13 PM