Japan: A Popular Tourist Destination for Thais
Japan is a top tourist destination for Thais due to its ease of travel, delicious cuisine, diverse attractions, and year-round appeal. Reviews consistently highlight the country's charm, prompting many to consider a visit. The allure of experiencing Japanese culture, savoring authentic cuisine, and enjoying leisurely strolls in cool weather while capturing picturesque moments is undeniable.
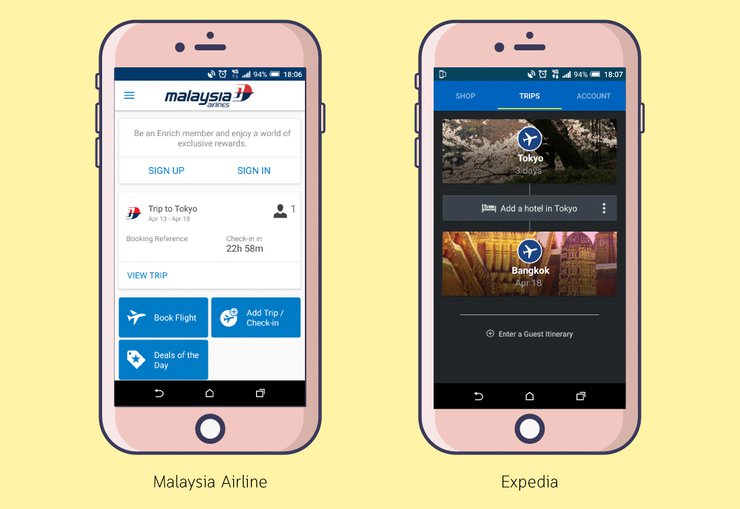
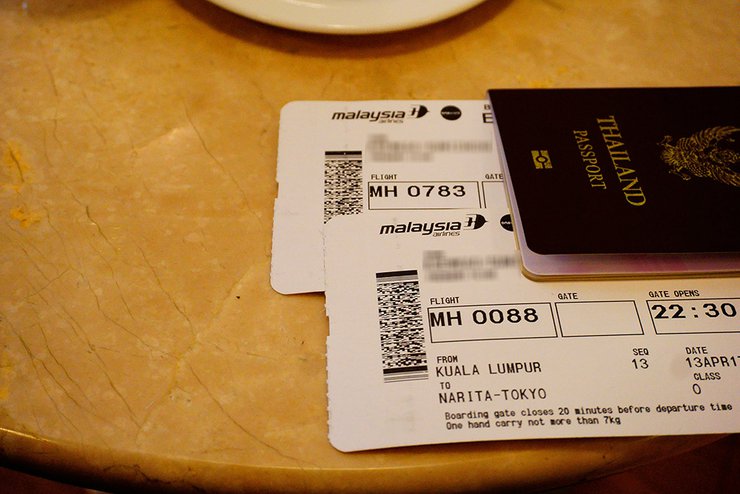
The initial step involved booking flights. After checking promotions on the "A-Pae" page, where a post announced a sale by Malaysia Airlines, the individual immediately proceeded to book tickets. (A-Pae provided a link to Expedia for booking.) Round-trip tickets from BKK-KUL-NRT / NRT-KUL-BKK were secured for the Songkran holiday period at a price of 8,9xx baht. The individual expressed surprise at the attractive price, even with a layover in KL.

I then booked a hostel through Agoda. I chose a capsule hotel called 1 Night 1980 Hostel Tokyo for 7xx per night. It was a capsule hotel with private sleeping capsules, so I didn't have to face anyone (I should mention that hotels in Tokyo are quite expensive for solo travelers, as there's no one to share the cost of the room with).
Traveling to Japan: From Airport to City
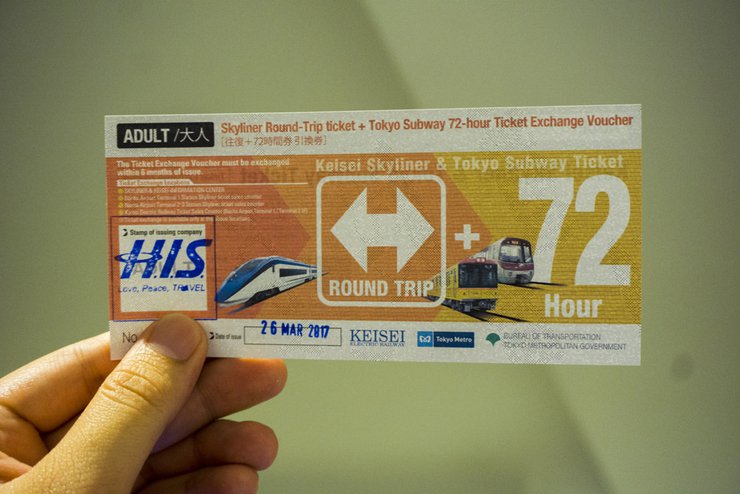
The trip to Japan is confirmed, and accommodation is booked. Now, the only remaining question is transportation from the airport to the city center. I plan to take the Skyliner from the airport to the city. I went to H.I.S. and purchased a Skyliner Round Trip + 72 hr Tokyo Subway Ticket package for 1,7xx. The ticket is valid for up to 6 months (plan carefully when to purchase). Remember to exchange this ticket for a train ticket at Narita Airport.

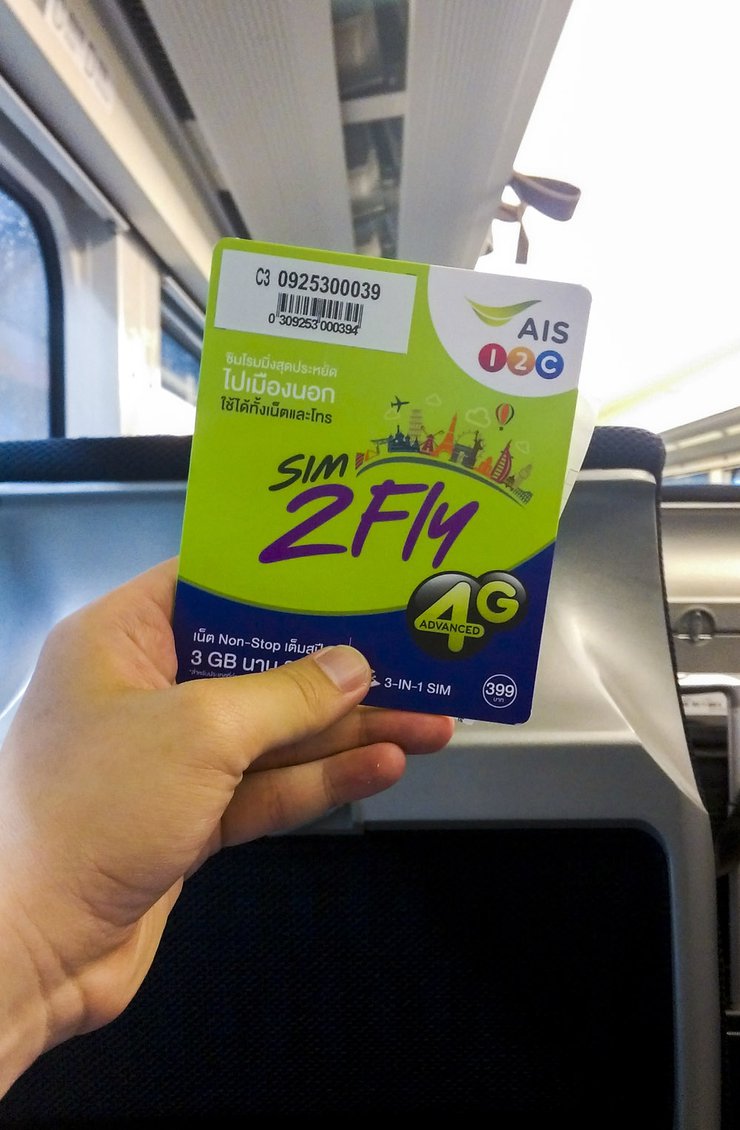
As a social media addict, I always need internet access. I chose Sim2Fly from AIS, which costs 399 baht. I activated it before leaving Thailand or in Japan. This SIM card can be used in many countries (including Malaysia, where we had a layover). I highly recommend it! The internet is super fast, so you can forget about hotel Wi-Fi. (If you don't want to throw it away after using it, keep it and top it up once a month. Then, when you travel to another country, you can just buy an additional package.)

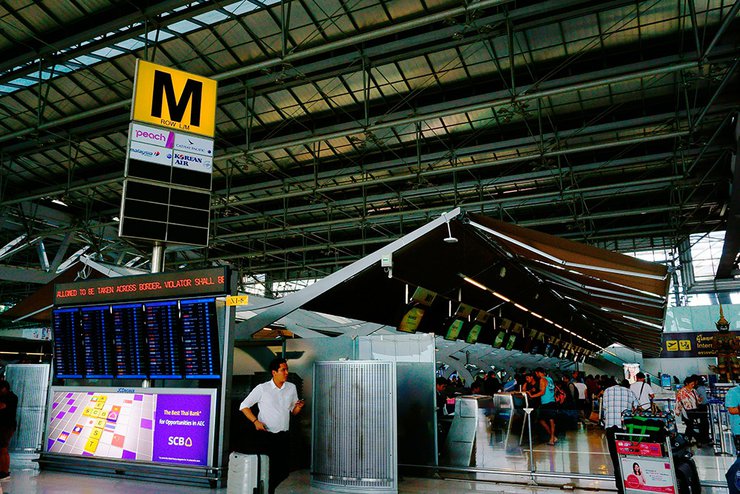
And then, the travel day finally arrived. At that time, there was news that MH had changed its flight schedule, and many people were left stranded. We were a little worried, but everything went smoothly in the end.


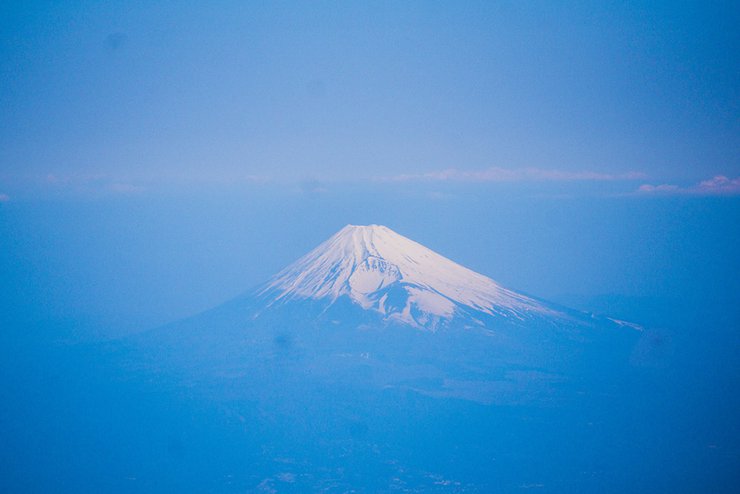
I departed from Suvarnabhumi Airport at 5:00 PM and connected to Kuala Lumpur at 12:30 AM (slightly delayed by more than an hour). After dozing off, I glanced out the window as we approached landing and saw Mount Fuji. I was so excited to finally be arriving in Japan!

Those who flew directly or connected in Hong Kong might have a clearer view. MH flew a bit far, but fortunately, our lens could still zoom in. Upon arrival at Narita, the excitement didn't end. I had read many reviews on Pantip, especially the threads about immigration, where everyone said that immigration and customs were brutal, with people being sent to the "cold room" frequently. However, don't believe everything you read. I walked through immigration calmly, and they didn't even ask about my health. When I reached customs, I handed over the customs form, and the officer didn't even look at it. She just said, "Okay, you can go." It was so easy! So don't worry too much. Just don't act suspiciously, and you'll be fine.
DAY 1

After clearing immigration, customs, and baggage claim, we will proceed to exchange our Skyliner+Subway Pass. Follow the "Train to City" signs and look for the Skyliner Keisei Information Center at the train station entrance.

The office is conveniently located opposite the train station entrance, next to Family Mart. Simply approach the staff and show them your ticket from Thailand. They will advise you on the best train schedule and print your ticket once you have chosen your preferred departure time.

The first ticket is for the train from the airport to Ueno. The ticket will show the round we chose (Date/DEP/ARR), the car we need to sit in (CAR), and our seat (SEAT). We will also get a return ticket to the airport (I forgot to take a picture of the other ticket). This ticket is a ticket that we need to exchange for another ticket. It is not a train ticket. We need to take that ticket to the ticket office and they will let us choose the return train time again.

This sentence describes a 72-hour subway ticket. Here's the breakdown:
- 72-hour subway ticket: This is the main point of the sentence. It indicates that the ticket allows for unlimited travel on the subway for 72 hours.
- 24-hour system: This clarifies how the 72 hours are calculated. The ticket operates on a 24-hour system, meaning that the 72 hours begin from the moment you first tap your card to enter the subway.
- Example: For instance, if you tap your card at 10:00 AM on Monday, your 72 hours will expire at 10:00 AM on Thursday.

Let's go! Let's take the train into the city together. Walk this way. If you haven't booked a ticket package from Thailand, you can buy a ticket here.

Upon entering the station, do not be confused by the blue signs. While Skyliner trains are blue, follow the orange signs instead. Once you pass through the gate, look to your left for a large orange door with the number 1 and the Skyliner logo. Enter through this door. When you reach the platform, look at the floor for the car number (Car no.) to ensure you are waiting at the correct location for your train.

The journey takes approximately 40 minutes to reach Ueno Station (only 2 stops). Upon arrival at Keisei Ueno Station, there are lockers available for those who wish to store their luggage before continuing their journey. (Be aware that large luggage lockers may be full, but smaller lockers are often available in the mornings.)

How to Use the Luggage Storage
- Find an available locker: Look for an empty locker with a green light.
- Open the locker door: Insert your coin or token into the slot and push the door open.
- Place your luggage inside: Make sure your belongings fit comfortably and securely.
- Close the locker door firmly: Ensure the door is completely shut and latched.
- Remember your locker number: Note down the locker number displayed on the screen.
- Proceed to the payment machine: Locate the payment machine nearby.
- Select English language: Choose the English option on the screen.
- Choose "Store luggage": Select the "Store luggage" option from the menu.
- Enter your locker number: Key in the locker number you noted down.
- Insert payment: Insert the required amount of cash or swipe your card.
- Collect your receipt: Take the printed receipt as proof of payment and locker number.

Keep the slip safe. It is recommended to take a picture of it. It will have a PIN to open the locker. (When you want to open the locker, just press the button to open the locker and enter the received code. The locker will close. It is recommended that when you open the locker, do not open it forcefully. Do not let the door bounce and close. Because if it closes, you have to pay to open the locker again. Hahahahahaha. )
Let's start our tour! The first stop is Sensoji Temple, a must-visit landmark for first-time visitors to Japan. It's easily accessible; after exiting Keisei Ueno Station, simply transfer to the Ginza Line.
A simple technique for finding the subway station when transferring between lines is to remember or find the symbol for each line. It will be a circle with the color of the line and the abbreviation inside, for example, the Ginza Line will be an orange circle with the letter G inside. Once you find it, follow the signs. To find the correct track or platform, check the number of the station you are going to. Each track will have a sign indicating the stations it travels from and to. The image below shows that Track 2 travels from G17 to G19.

You can use your 72-hour ticket to enter the station. The countdown will begin once you tap your card. Take the train from Ueno Station to Asakusa Station.

The tourist crowd was massive, especially in the street zone. However, the weather was pleasantly cool, and the wind was refreshing. It's advisable to bring a long-sleeved shirt.


The Sensō-ji Temple: A Historical Landmark in Asakusa
The Sensō-ji Temple, often referred to as the Asakusa Kannon Temple or the Temple of the Red Lantern, is a prominent Buddhist temple located in the Asakusa district of Tokyo. It holds the distinction of being the oldest temple in the city, with a rich history dating back to 628 AD.
Legend has it that two brothers, fishermen by trade, discovered a small statue of the goddess Kannon in the Sumida River. They brought the statue back to their village in Asakusa, where it was initially enshrined in a house. Subsequently, a temple was constructed around the statue in 645 AD, marking the birth of the Sensō-ji Temple.

Before reaching the temple, there is Nakamise-dori, a street lined with shops that stretches to the temple grounds. For those who purchase food from the shops on this street, the shops will only allow you to eat standing in front of the shop. This is to prevent food from spilling and littering the street, and it is considered an ironclad rule of the shops in the Nakamise-dori district.


At the incense point, there is a creative way to light the incense without worrying about the flame going out or burning your hand. Simply dip the incense into the center of the flame and hold it there for a moment. The incense will ignite instantly.

During the act of paying respects, I noticed some individuals discreetly cupping their hands to gather the incense smoke towards themselves. Interestingly, some did not even light incense but still proceeded to make a wish and cup their hands to gather the smoke.

For those who enjoy sweets, I recommend exploring different dessert shops. I hesitate to suggest specific recommendations, as everything we tasted was delightful.
Exit Sensoji Temple and cross the street to find the Tourist Information Center.


Enter the Tourist Information Center building and take the elevator to the 8th floor for a free view. (There are restrooms in the basement, a restaurant on the 8th floor, and exhibitions on other floors.)
Exiting the Tourist Information Center, turn right and continue straight ahead. You will find a popular photo spot with the Asahi Building and the red bridge. (With a good angle, you can also capture the Tokyo Sky Tree.)


Cross the red bridge and continue walking. You will soon reach Tokyo Sky Tree.


After walking back to catch the subway, we stopped by the Sumida River Park. The flowers were in full bloom, and it was a great place to take a break and enjoy the fresh air. Next, we headed to Ueno Park to see the cherry blossoms.

From Sensoji Temple to Ueno Park: A Journey by Subway
To return to Ueno Park from Sensoji Temple, simply take the subway back from Asakusa Station to Ueno Station. Look for the Ueno Park exit signs and follow the path.


Upon entering, I first encountered a shrine. Following Japanese customs, I washed my hands and mouth before proceeding.


Ueno Park offers a variety of attractions, including temples, shrines, a zoo, and museums. While I was unable to visit all of them, I highly recommend exploring the park. Ueno Park is conveniently located near Ameyoko Market, which is easily accessible by foot (simply open Google Maps and follow the directions).


The market offers a variety of food and necessities at reasonable prices (although some vendors may not be as friendly). I noticed that Thai people enjoy shopping at bag stores (especially those selling anello bags). In addition to the market itself, there are many shops and businesses surrounding it.

For those who prefer walking, you can walk directly to the Purple Building. (If you prefer not to walk, you can take the subway to Naka-Okachimachi Station and exit from Exit 3. The station is located near the Purple Building.)
After finishing my walk around the market, it was already late in the evening. I had to hurry to check in and take a shower (I left home for the airport at two in the afternoon yesterday, and I haven't even touched water yet, haha!).
English:

The hostel is located near Iriya Station on the Hibiya Line, just one station away from Ueno Station. Upon arrival at Iriya Station, take Exit No. 4 and walk straight for about 1 kilometer. The school will be on your left-hand side. After passing the school, turn left into the alley and then right into a smaller alley to reach the hostel. (You can also open Google Maps and follow the directions.)

In the evening, unsure of where to go, I decided to do some shopping. I took the subway from the hostel to Akihabara Station, a district popular with gamers and anime enthusiasts.


I arrived a bit late, and some stores had already closed, so I couldn't get the photos I wanted. If you're a game enthusiast, this place has everything you need (but come early!).

Besides games, is there anything else? Yes, there are. There are also great restaurants and a large branch of a Sex Shop in the area. It's a prominent green building.
Unsure of what to buy, and not being a gamer myself, I decided to take a stroll around Ginza instead. I boarded the same subway line and headed back to Ginza Station.


Ginza: A Shopper's Paradise
Ginza is a must-visit for any shopaholic visiting Japan. This district boasts a plethora of department stores, offering a wide array of goods to satisfy every desire. While prices may not be the cheapest, occasional sales and promotions can make the experience more enticing.
My first day in Japan concluded in Ginza, and I plan to continue exploring its shopping haven tomorrow.
Day 2
Day 2: Woke up at 5 am. Today, I have a lot of places to go. Without further ado, I started with the fish market. I started from Iriya Station to Tsukji Station. When I arrived, I walked towards the Tsukiji Hongan-ji exit (I don't remember if there was a gate closer to the market). As I walked, I saw Tsukiji Hongan-ji on my left (the building is majestic and grand). When I reached the intersection, before crossing the road, I looked across the street to see if there was a FamilyMart on the corner. If there is, it means I'm on the right track. I walked a little further and I arrived.

I had planned to visit the fish auction, but after reading reviews, I realized it would require waking up very early, taking a taxi (as the subway wouldn't be open yet), and queuing for some kind of ticket. Therefore, I decided to change my plans and simply grab something to eat and explore the market instead.


The fish market here sells both fresh and dried seafood. What I like about this place is that the market is very clean. The floor is completely dry, and there is no splashing water, so I don't have to dodge puddles. I haven't smelled any fishy or unpleasant odors yet. I like this kind of market because it's easy to walk around.


Many people might think that when visiting a fish market, they must eat fish dishes. However, after trying various dishes at different restaurants, both within the market and elsewhere in Tokyo, I found the taste to be quite similar. The freshness and price were also comparable to other places (although prices in the city center might be slightly higher). It's worth noting that some restaurants charge for soup, which is optional and costs around 100 yen. The soup wasn't particularly delicious, so you might want to skip it.
Let's continue our journey. From Tsukji Station, take the same line to Kamiyocho Station. We're going to Tokyo Tower!

Upon arriving at Kamiyocho Station, I opened Google Maps and followed the directions (Google has always been my guide in life). It might seem a bit confusing, as I didn't prepare a physical map with a planned route. However, after searching on Google Maps, I found that it included all the locations I needed. I simply walked along, looking up at the sky. If I saw the top of Tokyo Tower, I knew I was on the right track.


Those with a JCB card can enjoy free access to the Observation Deck. However, we opted out due to time constraints caused by our extensive exploration of the fish market. We were concerned that continuing would jeopardize our planned itinerary, especially considering our existing plans to visit the Roppongi observation deck. A short walk from Tokyo Tower, we encountered the Zōjō-ji Temple.


This temple is said to be the burial ground of six generations of shoguns. Many parts of the temple have been renovated, except for the main entrance gate, which is considered the oldest part of the temple. Many Japanese people come to celebrate and pray for good fortune on New Year's Day at this temple.
After exploring Zojo-ji Temple, we will continue to the Imperial Palace. Take the subway back to Kamiyocho Station, ride one stop to Kasumigaseki Station, and transfer to the Chiyoda Line (look for the dark green circle with a "C" inside after exiting Kasumigaseki Station). Ride to Otemachi Station (there are multiple ways to reach the Imperial Palace, and you can get off at several stations, but I believe Otemachi Station requires the least walking and is closest to the entrance).

From Otemachi Station to the Otemon Gate
Walk up from Otemachi Station to the Otemon Gate (see Google Map for reference). This gate serves as the entrance to the Imperial Palace. Upon reaching the gate, you will need to have your bag inspected and receive an entry ticket (free of charge). Keep the ticket safe as you will need to return it upon exiting.
Note: There is another gate for visitors who wish to join a guided tour. These tours are offered at specific times and are also free of charge. However, be prepared to wait in line, as it tends to be longer than the entrance for self-guided tours. If you see a long queue with people holding numbered tickets, head to the other gate instead if you prefer to explore independently.


The Tokyo Imperial Palace is the residence of the Emperor of Japan. The palace complex includes the Imperial Palace, the residences of the Imperial Family, the Imperial Household Agency, and a large park. The palace was originally the site of Edo Castle, but the original palace was largely destroyed by bombing during World War II. As a result, the palace was rebuilt in 1964.
After a long walk, I couldn't find the Megane Bridge. (I knew I hadn't done my homework well enough.) When I opened the map, I realized it was outside the palace grounds. So I walked out. To get to the Megane Bridge, you have to walk around the palace. (The term "walk around the palace" sounds familiar.) If you're too lazy to walk, you can take the subway. Get off at Sakuradamon Station. But I walked. There were a lot of people exercising around the palace. (Be careful when walking.)


Nijubashi, also known as the "Megane Bridge," is best captured when its reflection in the water forms the shape of eyeglasses. (Please excuse my amateur photography skills.)


The next stop is the Meiji Shrine. I walked from the Megane Bridge to the Sakuradamon subway station, took one stop to Yurakycho Station, and changed to the Chiyoda Line at Hibiya Station (those who can walk can walk from the Megane Bridge to Hibiya Station). Then I took the train to Meiji-Jingumae Station and exited through the exit marked "Meiji Shrine" (this area is Harajuku, in case you can't remember).


A short walk from the train station, you will encounter a large wooden Torii gate, signifying your entry into the sacred grounds.


Following the path, you will encounter a zone with restaurants and souvenir shops before reaching the shrine.

The Meiji Shrine is a Shinto shrine built in 1920 to honor the spirits of Emperor Meiji and Empress Shoken. The shrine is located in a dense forest in the heart of Tokyo, offering a serene escape from the bustling city.

The shrine was under renovation when I visited, and it was covered with tarpaulin. (It was a bummer.)

The shrine was closed for renovations, but luckily we were able to witness a wedding ceremony taking place there. After leaving the temple, we went for a walk in the Harajuku district. We hadn't planned on it, but we had some extra time, so we Googled it and found that there were many places to walk around and shop. (If you enter from one way, you exit from the same way. If you exit from another way, you'll end up somewhere else.)


After exiting the Meiji Shrine, I crossed the street and wandered aimlessly (it seemed I hadn't planned anything). I walked to Takeshita Dori and then continued to the Omotesando district. This area reminded me of Orchard Road in Singapore or Causeway Bay in Hong Kong, with shops lining both sides of the street and bustling crowds.
I arrived at the Omotesando district and took the Ginza Line subway from Omote-Sando Station to Shibuya Station.


Upon exiting the station, we first greeted Hachiko (the day before, we saw a cat sitting there, and we really wanted to see it!).


Shibuya boasts department stores and shopping areas similar to many other places I've visited. However, one unique experience is crossing the Shibuya Crossing (yes, it's truly iconic). If you want to capture the bustling crowds traversing the intersection, head to the Tsutaya Building and grab a coffee or beverage at Starbucks. Relax and find a good angle for your photo. (As for me, I was hungry, so I went to find something to eat.)
As dusk settles, a sudden urge to visit Odaiba and capture the iconic Rainbow Bridge in a photograph takes hold. To embark on this journey, we board the subway at Shibuya Station, bound for Shimbashi Station. Upon arrival, we follow the signs for the Yurikamome Line, easily identifiable by its distinctive logo.

Take the Yurikamome Line from Shimbashi Station. (Please note that the Yurikamome Line does not accept Subway Pass; you will need to purchase a new ticket.)

To purchase a ticket, follow these simple steps: 1. Check the price for your desired station. 2. Select your preferred language. 3. Choose the number of passengers. 4. Select your desired ticket price. 5. Insert coins into the machine. 6. Collect your ticket.
Take the train from Shimbashi Station to Odaiba-Kaihinkoen Station. After exiting the station, walk forward along the railway tracks. You will find a walkway leading to Palette Town, which has a Ferris wheel.

By the time I arrived, it was already dark. If you come in the evening, there will be restaurants open on the lawn in front of the Ferris wheel (when I came, they were all closed). Just stay here for a while and then walk to Diver City (the mall with the giant Gundam, but it's not there right now, you'll have to wait a bit because a new, bigger one is coming to replace it). In the mall, there is a shop selling souvenirs like sweets from Odaiba. The cheesecake is delicious! I really wish I had bought some to take home (I ate it all and don't have any pictures to show for it).

Exiting Diver City, I crossed the street and encountered the massive Fuji TV building with a spherical object in its center (it was too dark to photograph). Continuing across the street, I arrived at a park where I captured the iconic Rainbow Bridge. With a packed itinerary for the day, my legs were weary. After photographing the Rainbow Bridge, I decided to return to my hostel, as I had a trip planned outside the city the following day.
DAY 3
Today, I ventured out of the city to Kamakura. I had planned to spend only half a day there (let me tell you, don't plan for half a day, plan for a whole day because there are so many places to visit, which we really missed). I started my journey by opening Hyperdia.com and looking for trains to Kamakura with a single transfer.

Take the subway to Tokyo Station and then walk to JR Tokyo Station. Purchase a ticket from JR Tokyo Station to Kamakura for 920 YEN.

To purchase a JR ticket, check the price on the map or on Hyperdia > Change the language > Select the number of people > Click on the price > Insert money > Receive the ticket. Then, walk into the JR station and look for the Yokosuka Line sign. Walk to the platform.

Once you have arrived at the platform, you can check which train to board. Hyperdia provides detailed information on the track number and departure time (which is usually accurate). For example, if Hyperdia indicates that the train departs at 7:12 am from Track 1, you can verify this information on the platform signage. Once confirmed, proceed to the designated track and wait for the train's arrival.

To ensure you board the correct train (as multiple trains pass through the same platform), check the side of the train car. It should indicate "for ZUSHI." If so, board the train (but remember, men are not allowed in the Lady's car). The seating is similar to that of a subway, with no assigned seats (as you did not purchase a reserved seat ticket). The journey takes approximately 50 minutes and will arrive directly at Kamakura Station.

My Kamakura itinerary only includes three stops (remember, if you're visiting, plan for a full day as there are many attractions). For those who plan to spend the entire day, consider purchasing a Kamakura Pass.
Upon arrival at Kamakura Station, proceed directly to Tsurugaoka Hachimangu Shrine. Follow the signs from JR Kamakura Station to avoid getting lost.


The shrine is quite a distance from the train station, but the morning air is pleasant, so it's not tiring or hot (although I am hungry). The temple is very large and is an ancient shrine. Before reaching the main shrine, there are food stalls along the way (but I arrived too early, and the shops haven't opened yet).


Tsurugaoka Hachimangu Shrine, a significant Shinto shrine in Kamakura, was founded in 1063 by the warrior Minamoto Yoriyoshi. Later, it was expanded and relocated to Kamakura by Shogun Minamoto Yoritomo, with the intention of dedicating it to the deity of war and the Minamoto samurai clan. The shrine's main building is situated on a hill, requiring an ascent via stairs. Within the shrine, a museum houses a collection of swords, masks, documents, and historical artifacts.

After visiting the shrine, we continued to Komachi-dori, a path leading back to the train station. As usual, the shops were not yet open because we arrived too early (shops typically open around 9:00 AM).

Upon returning to Kamakura Station, we will not enter the JR Station. Instead, we will take the local train (the entrance is nearby) to our first destination, Enoshima Island. (The ticket purchase process is the same as for JR tickets; please refer to the previous section for details.)


Upon exiting the station, turn left and proceed down the alleyway. You will encounter numerous shops and restaurants lining the path.


There are two ways to get to Enoshima Island: 1. Walk across the bridge, which is a long walkway leading to the front of the island. It's free and good for your health. 2. Take a boat across the island. The boat will take you to the back of the island as shown in the last picture. There is a fee for this service. In the past, it is said that before there was a bridge, villagers had to wait for the tide to go out before they could walk across to the island.

Here's the translation:
This is the way up to the court. There are still food stalls on both sides of the road (lots of seafood!). There are two ways to climb the hill: you can walk up normally, or if your legs are tired and you don't want to walk a lot, you can use the escalators at various points (for a fee).


Enoshima Jinja Shrine is dedicated to the island's deity of fortune. The shrine complex encompasses three smaller shrines scattered across the island.


As you walk further up, you will come across the Hetsu no Miya Shrine. Japanese people like to walk through the hoop at the front (the green hoop) for good luck.

Each rest stop has a shrine for worship. As for whether the climb is tiring, it is not. You can walk at your own pace, but it may not be suitable for people who are not in good health or who have leg problems. (You can also use the escalator.)


Visiting the island wouldn't be complete without taking in the stunning ocean views.

The mountaintop offers a restaurant for those who wish to dine with a view. For panoramic vistas, visitors can ascend the tower for a fee (which I opted against due to the cost). Descending, I observed the throngs of people making their way to Enoshima. The crowds were immense.

Those who arrive at the right time (which is when?) will also be able to see Mount Fuji (I tried my best to adjust it to be visible).

While there are many other activities to enjoy on the island (but we were in a hurry!), we took the train back to Hase Station to visit the Great Buddha statue at Kotokuin Temple.


From Hase Station, walk straight following the signs for a long time until you reach your destination. You will need to pay a toll fee (I don't remember how much it was).


The Great Buddha statue, known as Daibutsu, was constructed in 1252 AD. Initially housed within a temple hall, the structure suffered damage from storms and earthquakes, eventually leaving the statue exposed to the elements. Daibutsu is crafted from bronze and copper, and its current green hue is attributed to a chemical reaction resulting in the accumulation of metal oxides over time.
Beneath the Great Buddha, there is a path leading down (which also costs money - why is everything so expensive? Haha!). After taking a long break at this temple, it was time to return to Tokyo. I deeply regret not being able to see all of Kamakura. On the way to this temple, there were many other places that I should have visited, and there are still many places in Kamakura that I should have gone to, but I didn't because I had planned my trip in a hurry (such a shame!).
In the afternoon, I planned to return to Tokyo by JR train from Kamakura Station to Shinjuku Station. I checked Hyperdia to see which trains could take me to Shinjuku and chose the one that was about to arrive. I had to transfer twice, first from Kamakura to Ofuna Station, then change tracks and lines at that station. I waited for a long time, but no train stopped at that platform. (Oh no, I'm stuck, I don't know where I am!) The easiest solution was to change my destination to Tokyo Station. I opened Hyperdia again and found a train from Ofuna Station to Tokyo Station, then I could take the subway to Shinjuku. (Sigh, actually, I could have just taken the same line back from Kamakura to Tokyo and that would have been it. If anyone knows how to get to Shinjuku, please let me know.)

After a long and confusing journey, I finally arrived at Shinjuku, where the usual hustle and bustle of the city greeted me.

Stop by to say hello to Godzilla on Central Road in the Kabukicho district.


Kabukicho is the largest entertainment district in Tokyo (or so they say). Walking into an alley alone, wandering aimlessly in and out of alleys, I finally got caught. Someone called me into a shop, speaking rapid Japanese at me, even gesturing. When I didn't go in, they followed me! (Whew, that was a close one.)
DAY 4
The day began with another train ride out of the city. Today's destination was Kawagoe, starting from Ikebukuro Station. Upon arrival, I looked for the Tobu Line train (see logo in the image).

How long should I spend in Kawagoe? How do I buy tickets? I recommend spending the whole day and buying the Kawagoe Pass (including train and sightseeing bus fares). It's worth it, but I didn't use it because I was only going to be there for half a day (what a shame, I shouldn't have planned for just half a day).

Single-trip tickets can be purchased in the same way as other train lines. However, if you wish to purchase a Kawagoe Pass, please contact the Information Desk. To enter and exit the station, simply show your pass to the staff.

Upon arrival at Kawagoe Station, those who require a map or have any inquiries can visit the Tourist Information Office. For this trip, I opted to forgo the bus and explore on foot (a wise decision to give my legs some exercise).


The town is charming, with small houses, narrow streets, and few cars. Locals ride bicycles. The old town and the modern district are quite far apart. It's more convenient to use a pass and take the bus (it's less tiring). Temples and shrines are located close to each other in this area.


After strolling past two shrines, you will reach Kitain Temple after a short walk.


Kita-in Temple: A Historical Gem with 540 Unique Rakan Statues
Kita-in Temple, a Tendai Buddhist temple founded by the monk Ennin during the Heian period, stands as a testament to resilience and artistic mastery. Despite suffering a devastating fire that nearly destroyed the entire structure, the temple was meticulously rebuilt with the support of the Tokugawa shogunate, incorporating parts of Edo Castle to expedite its completion.
Within its serene grounds, visitors are captivated by the breathtaking sight of 540 Gohyaku Rakan statues, each meticulously crafted with distinct facial expressions. These statues, representing disciples of the Buddha, embody the temple's dedication to spiritual enlightenment and artistic excellence.

Adjacent to the Kitain Temple is the Naritasan Kawagoe Betsuin Temple, a smaller temple.

From this temple, I walked to the old town, which was quite a distance. As usual, I opened Google Maps and searched for Kurazukuri Street or Toki no Kane, and then followed the directions.


The streets of Kurazukuri retain the charm of the Edo period, with buildings that once served as warehouses now converted into shops, preserving their architectural heritage.


A short walk will lead you to the Toki no Kane bell tower, a symbol of Kawagoe City. This bell tower was used to tell time during the Edo period, but it is not the original version. The current bell tower is the fourth iteration, rebuilt after the original was destroyed by fire.

After visiting the Kawagoe train station, there are several shrines to explore along the way.

A short walk from here, you will find CREA MALL, a shopping center in Kawagoe, conveniently located near the train station.

It was time to return to Tokyo. I only had half a day to explore Kawagoe (but not completely). In the afternoon, I had to buy some things in downtown Tokyo. I planned to go see the view at Roppongi at night, but I had to cancel because of the heavy rain. I was afraid that I wouldn't be able to see anything clearly if I went to see the view while it was raining heavily, plus I was tired and sore.
This concludes my trip to Tokyo. I returned to Bangkok the next day (departing at 10:30 AM, connecting in Kuala Lumpur as usual, and arriving in Bangkok at 8:00 PM, a journey that took a full day).
Although I managed to visit almost all the places I wanted to, I couldn't fully enjoy every location due to my limited time in Tokyo (only 4 days). Therefore, I prioritized visiting the main attractions (not recommended as a general approach). Overall, I was satisfied with my trip, but for my next visit, I will plan a more relaxed itinerary with full-day explorations. This will ensure that I don't miss anything, as every place in Japan is worth exploring, regardless of the season, time, or city.

Estimated Expenses for Tokyo Trip (Excluding Shopping and Food)
Flights:
- Roundtrip airfare from Bangkok to Narita on Malaysia Airlines: 8,9xx baht
Accommodation:
- 1 night at 1980 Hostel: 2,9xx baht
Transportation:
- Skyliner + 72-hour Subway Pass: 1,7xx baht
- 48-hour Subway Pass: 180 baht
- Sim2Fly: 399 baht
- Roundtrip train fare to Odaiba: 250 baht
- Roundtrip train fare to Kamakura: 580 baht
- Train fare within Kamakura: 200 baht
- Roundtrip train fare to Kawagoe: 280 baht
Entrance Fees and Miscellaneous:
- Entrance fees, tolls, and other miscellaneous expenses: 300 baht
Food, Souvenirs, and Shopping:
- Estimated cost: "Bankruptcy"
Follow us for travel reviews and discussions:
- Facebook page: เที่ยวคนเดียวต้องสตรอง (Traveling Alone Must Be Strong)
- Link: https://www.facebook.com/singletravelTH/
เที่ยวคนเดียวต้องสตรอง
Tuesday, October 8, 2024 10:28 AM

