


Hello, we recently visited Leh Ladakh, India in early May and would like to share our experience with obtaining an e-visa for India. This is an alternative option for Blue Planet members who are planning to visit India, especially since the Indian Embassy has recently increased the price of regular visas, effective April 1, 2017. The price has almost doubled, making the e-Visa a more attractive option for those who do not plan to travel to India again within 6 months or 1 year.
The process is incredibly simple and can be completed with just a few clicks, eliminating the need to wait in long lines at the embassy. This is ideal for individuals residing outside of major cities or those who prefer to avoid taking time off work. Applications submitted today will receive a visa response within 72 hours. The process is not only quick and easy but also more affordable than applying directly at the embassy. However, it's important to note that E-Visas have certain limitations and may differ from visas obtained at the embassy. Let's explore these differences in detail.
Note that tourist visas for India can be obtained in two ways:
1) Regular Visa application submitted directly to the embassy - we have no information on how to apply.
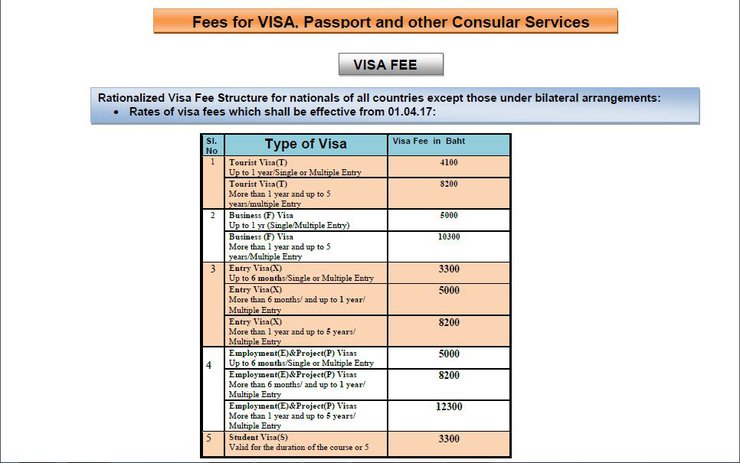
The updated visa fee for a 1-year tourist visa is 4,100 baht.
The e-Tourist Visa fee is $50, or approximately 1,800 baht.

2) Apply online (E-Tourist Visa) - which we will review.
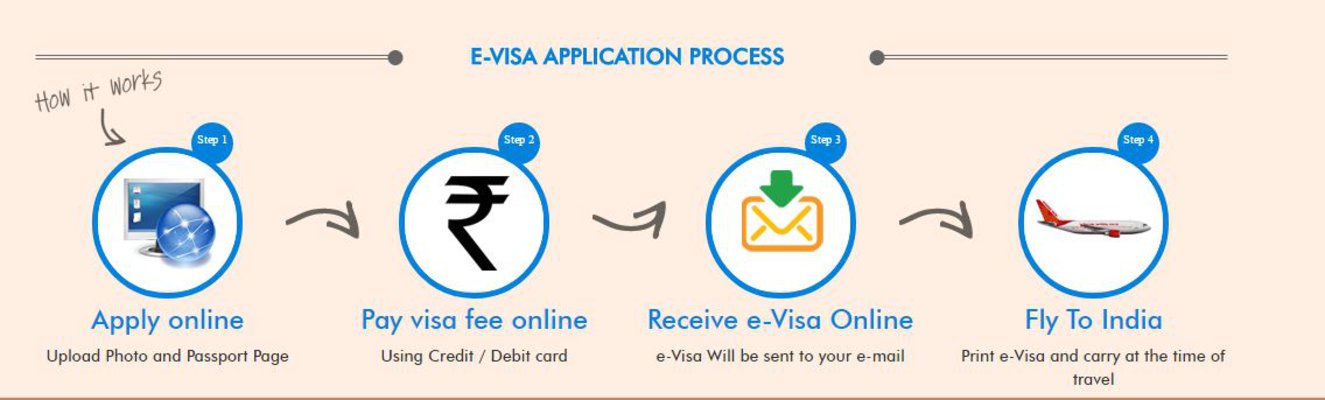
The application process is very simple, as shown in the figure below.
Apply online >> Pay online >> Get your visa online >> Let's go to India!

Things to Know Before Applying for an E-Tourist Visa
1) This is a tourist visa that allows you to stay in India for 60 days from the date of entry.
(Recently changed in April 2017 from the original 30 days)
2) The visa type is Double Entry, which allows for two entries and exits from India within 120 days.
(Recently changed in April 2017 from the original Single Entry, allowing only one entry into the country.)
3) Tourists can apply for an E-Tourist Visa no more than twice per calendar year.
4) **Apply for a visa at least 4 days before your trip. For example, if you are traveling on September 5th, the latest you can apply is September 1st. And**
*The visa will be valid for 120 days (4 months) from the date of approval, as determined by the embassy.
e-Visa Entry Points in India
e-Visas are only valid for entry at the following 24 airports:
- Ahmedabad
- Amritsar
- Bagdogra
- Bengaluru
- Calicut
- Chennai
- Chandigarh
- Cochin
- Coimbatore
- Delhi
- Gaya
- Goa
- Guwahati
- Hyderabad
- Jaipur
- Kolkata
- Lucknow
- Mangalore
- Mumbai
- Nagpur
- Pune
- Tiruchirapalli
- Trivandrum
- Varanasi
Note: This list was updated in April 2017, expanding the number of entry points from the previous nine airports.
The three ports of call are Cochin, Goa, and Mangalore.
In addition, before going, our friends were quite worried that the e-Visa would not be used to enter Leh. If you are going to Leh, Ladakh, you can apply for an E-Visa (but you must enter India through one of the 24 airports listed above, such as New Delhi or Mumbai). At first, we were not sure if it would work, but now we can confirm that it is 100% usable.
Inner Line Permit for Ladakh
Inner line permits are required for visiting various locations in Ladakh due to its sensitive border location. These permits can be obtained through travel agencies in Ladakh for a fee of 700 rupees (approximately 350 baht) per person.
___________________________________________________________
Required Documents for Application
1) Scanned passport front page (PDF File) with a size not less than 10 KB but not exceeding 300 KB.
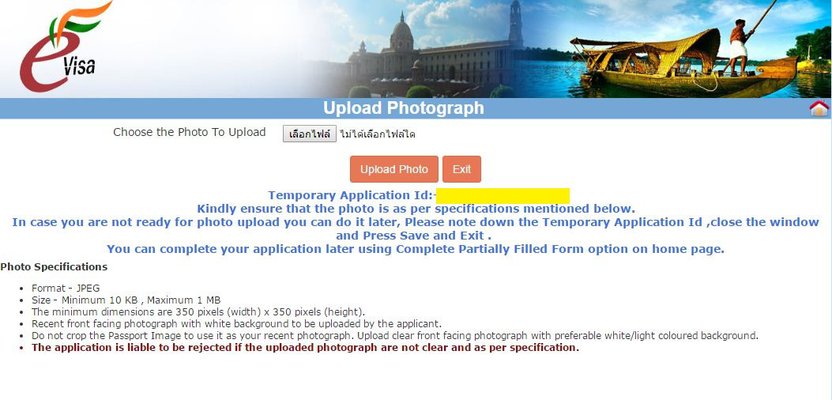
2) Applicant's photograph file
- Must be a JPEG file
- Image size: Minimum 10 KB, maximum 1 MB
- The image width and height must be the same size, such as 2x2.
- The image must be a clear, front-facing view of the entire face, with no accessories obscuring the face.
- The background color should be white or a light color, but white is recommended.
- No borders/frames.
3) Accommodation address/hotel in India, phone number > To be filled in during registration
Great! If you have prepared according to the list above, let's go fill out the E-Visa now!
1. Visit the website https://indianvisaonline.gov.in/evisa/tvoa.html
- Click on the "e-Visa Application" tab at the top.

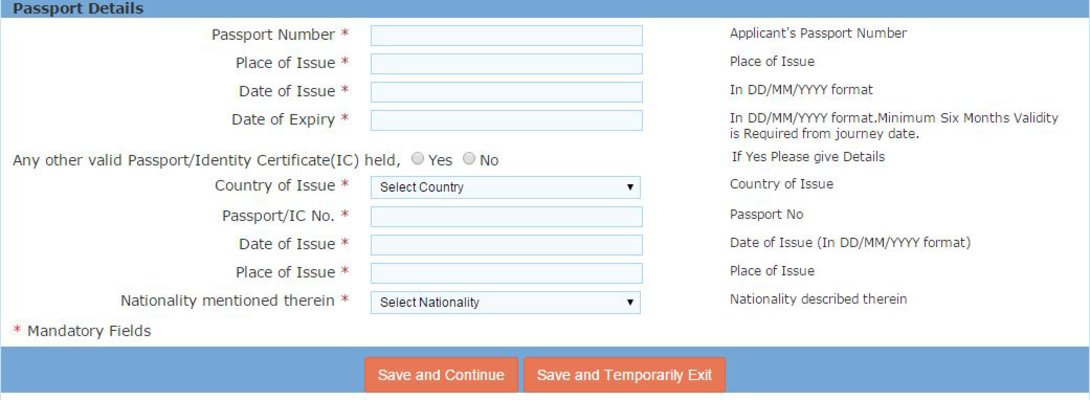
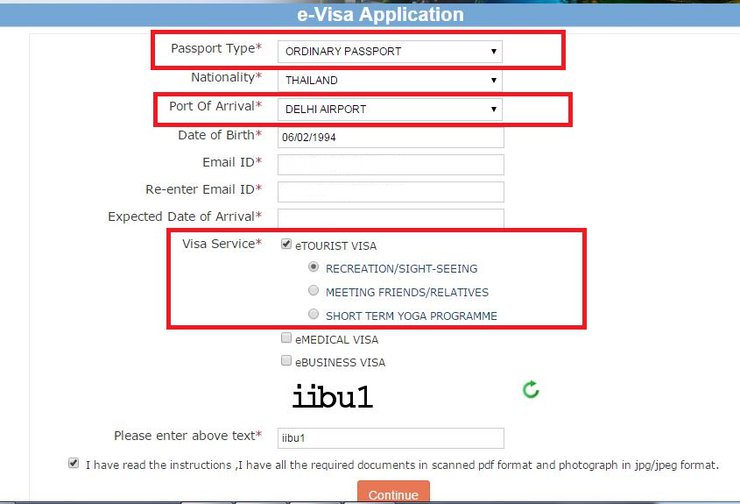
3. On the first page, fill in all the required fields marked with an asterisk (*).
Passport Type: Select "Ordinary".
Port Of Arrival >> Select arrival airport
Visa Service >> Select eTOURIST VISA

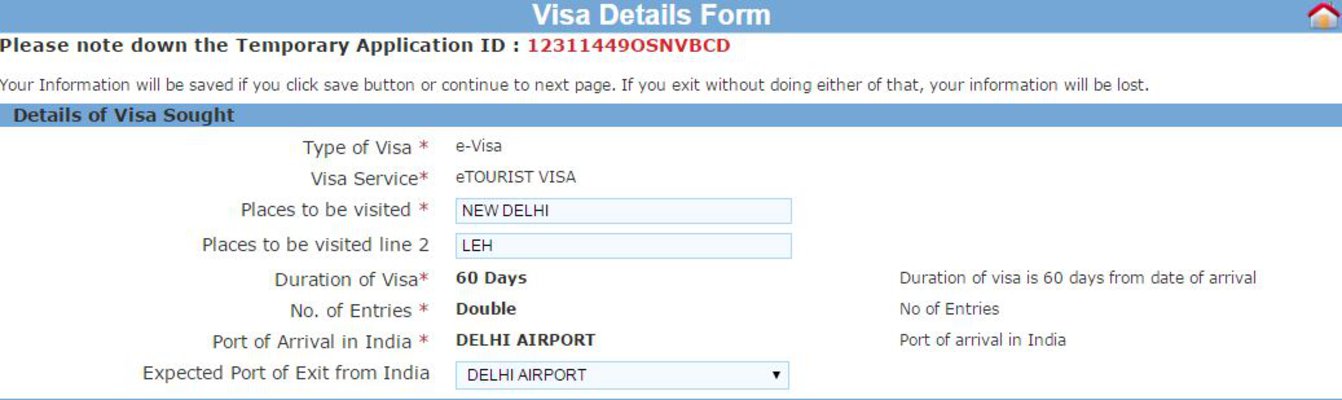
4. Proceed to the next page. The red-framed section contains your Temporary Application ID. Please note this number down in case you need to return to complete the form later. You can access the partially filled form at https://indianvisaonline.gov.in/evisa/CompletePartially.

5. Please fill in all the information on each page. Please continue filling in the information as there are quite a lot of pages.
This page confirms that we have been granted a 60-day visa, which is a Double Entry visa, as mentioned above.


- Once all pages are filled out, you will be prompted to upload a photo and passport page. Please review, edit, and confirm your information again.


8. Online payment - Visa application status will be confirmed as submitted only after we have paid!
- Visa fee: $50 + charge (approximately 1,800 baht)
- Upon successful payment, you will receive an email confirming receipt of your Visa Application. The processing time for your application is 72 hours.
- You can check your visa status by entering your Application ID at the following link: https://indianvisaonline.gov.in/evisa/StatusEnquiry

9. Our e-Visa was actually approved within 24 hours, not the full 72 hours. We received an email notification as usual.
The e-Visa or ETA document must display the word "GRANTED" to confirm visa approval. Once you see this, you're ready to pack your bags and embark on your journey!
- Save the e-Visa file as shown in the image below from the Visa Status >> Print Status menu.

10. **Essential**: Print your e-Visa or ETA before your trip. You will need it to pass through immigration in Thailand and to receive your visa upon arrival in India. You can also save a PDF copy on your mobile device.
11. Upon arrival at the Indian airport, proceed to the E-Visa lane for immigration clearance, which is separate from the regular immigration lane.
Using the ETA document with your passport will result in a visa stamp similar to the image below.
Additionally, once you have received the visa stamp, you can enter the normal Immigration channel on your next visit to India, without having to go through the E-Visa channel again.
The Indira Gandhi Airport symbol signifies our arrival in India! The Immigration E-Visa line is located beyond the image above. We waited in line for approximately one hour. If you have a connecting flight, remember to factor in extra time. Additionally, don't forget to print your flight details page or save it as an image/PDF on your phone before your trip. Most airports in India will request to check it at the entrance.
This concludes our review. We hope that the information we have shared will be useful to you. If you have any further questions, please feel free to leave a comment below.
If you have any questions or need help filling out the form, please feel free to contact us on our Facebook page: https://www.facebook.com/Everywherewewander/
In our next post, we will share information about our trip to Leh Ladakh.
ไปทั่วไปทีป
Tuesday, October 8, 2024 11:16 AM